はじめに
有名なツールなのでipythonについていまさら説明しなくとも使い込んでいる方も多いと思いますが
http://ipython.org/
にて配布している、インタラクティブshellとしても使えるpythonです。
最近はデータ分析系の方々に知名度が高いようですね。
インストール
AmazonLinuxの場合、標準のリポジトリにはないのでepelを利用してください。
$ sudo yum --enablerepo=epel install python-ipython
実行
installが正常に終わったらさっそく実行してみます。
|
1 2 3 4 5 6 7 8 9 |
$ ipython Python 2.6.9 (unknown, Mar 28 2014, 00:06:37) Type "copyright", "credits" or "license" for more information. IPython 1.1.0 -- An enhanced Interactive Python. ? -> Introduction and overview of IPython's features. %quickref -> Quick reference. help -> Python's own help system. object? -> Details about 'object', use 'object??' for extra details. |
UNIXコマンドツール
日常のUNIXコマンドの実行は頭に!を付ければ実行できます。
|
1 2 3 4 5 |
In [10]: !ps PID TTY TIME CMD 11110 pts/0 00:00:00 bash 11219 pts/0 00:00:00 ipython 11273 pts/0 00:00:00 ps |
|
1 2 3 4 5 6 7 8 9 |
In [11]: !ls /bin arch cut dmesg fgrep ipcalc ls mv readlink setserial tracepath usleep awk dash dnsdomainname find iptables-xml lsblk nano red sh tracepath6 vi (snip) mktemp ping6 rvi sync uname chown dbus-uuidgen env gunzip ln more ps rview tar unicode_start cp dd ex gzip loadkeys mount pwd sed taskset unicode_stop cpio df false hostname login mountpoint raw setfont touch unlink |
もちろんパイプも使えます
|
1 |
In [13]: !ss | less |
pythonらしく使う
せっかくpythonの処理系の上にいるので!をつけてコマンドをたたくだけだと、ただ面倒になっただけなのでpythonらしい使い方をします。
|
1 |
In [17]: net = !ss |
ssの実行結果を変数に入れることができます。変数はそのまま入力するとオブジェクトの内容を表示します。
|
1 2 3 4 5 6 7 8 9 10 11 12 13 14 15 16 17 18 19 20 21 22 |
In [18]: net Out[18]: ['Netid State Recv-Q Send-Q Local Address:Port Peer Address:Port ', 'u_str ESTAB 0 0 * 7622 * 7621 ', 'u_str ESTAB 0 0 * 7642 * 7643 ', 'u_str ESTAB 0 0 * 54038 * 54037 ', 'u_str ESTAB 0 0 * 6794 * 6793 ', 'u_str ESTAB 0 0 * 7594 * 7595 ', 'u_str ESTAB 0 0 * 7637 * 7636 ', 'u_str ESTAB 0 0 * 7586 * 7587 ', 'u_str ESTAB 0 0 * 7615 * 7616 ', 'u_str ESTAB 0 0 * 7619 * 7618 ', 'u_str ESTAB 0 0 * 7633 * 7634 ', 'u_str ESTAB 0 0 * 7583 * 7584 ', 'u_str ESTAB 0 0 * 7607 * 7606 ', 'u_str ESTAB 0 0 * 7598 * 7597 ', 'u_str ESTAB 0 0 /var/run/dbus/system_bus_socket 6800 * 6799 ', 'u_str ESTAB 0 0 * 7625 * 7624 ', 'u_str ESTAB 0 0 * 7646 * 7645 ', 'tcp ESTAB 0 80 172.31.6.147:ssh 110.4.174.177:52024 '] In [19]: |
画面からあふれて困るときにはページャとしてpageコマンドが使えます。
|
1 2 3 4 5 6 7 8 |
In [20]: page net ['Netid State Recv-Q Send-Q Local Address:Port Peer Address:Port ', 'u_str ESTAB 0 0 * 7622 * 7621 ', 'u_str ESTAB 0 0 * 7642 * 7643 ', 'u_str ESTAB 0 0 * 6793 * 6794 ', (snip) 'u_str ESTAB 0 0 * 7624 * 7625 ', : |
結果はpythonの配列なので配列に対しての操作ができます
|
1 2 3 4 5 6 7 8 9 10 11 12 13 14 15 |
In [24]: process = !ps -axg In [25]: process.grep('httpd') Out[25]: [' 1556 ? Ss 0:17 /usr/sbin/httpd', ' 1578 ? S 0:00 /usr/sbin/httpd', ' 1579 ? S 0:00 /usr/sbin/httpd', ' 1580 ? S 0:00 /usr/sbin/httpd', ' 1581 ? S 0:00 /usr/sbin/httpd', ' 1582 ? S 0:00 /usr/sbin/httpd', ' 2584 ? S 0:00 /usr/sbin/httpd', ' 2585 ? S 0:00 /usr/sbin/httpd', ' 2586 ? S 0:00 /usr/sbin/httpd'] In [26]: |
notebookインタフェース
|
1 |
$ ipython notebook |
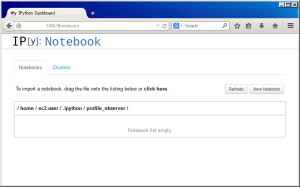
で起動すると立派なWebインタフェースが起動します。
デフォルトではブラウザも起動しますので、適宜--no-browserをつけて起動すると良いです。
|
1 |
$ ipython notebook --no-browser |
またポートは8888で起動しますので、こちらも困るって場合には
|
1 |
$ ipython notebook --no-browser --port=8080 |
などで指定できます。
tornodoをつかったすごくきれいなインタフェースです。
notebookをリモートサーバとしてセットアップ
デフォルトでは127.0.0.1にbindして起動しているためローカルからのみ利用ができます。外部から利用するにはプロファイルで設定が必要となります。
オフィシャルのドキュメントを参照していただけば容易な内容ですが手順を示します。
パスワードを生成します
ipythonのモジュールの中でパスワード生成のツールが用意されていますので利用しましょう。
|
1 2 3 4 5 6 |
In [1]: from IPython.lib import passwd In [2]: passwd() Enter password: Verify password: Out[2]: 'sha1:046e2277e775:7fbd40dd1514280715e17c48b2e3a86258cde63c' |
出力結果を見ての通りsha1のハッシュを生成するだけなので、同じようにsha1が生成できれば他のツールでも問題ないかと思います。
プロファイルに記載します
リモート用のプロファイルを作成しておきます
|
1 |
$ ipython profile create nbserver |
これで~/.ipython/profile_nbserverの中にdefaultとは別のリモート用プロファイルが作成されます。
さっそく、リモートサーバ用のコンフィグを編集します。
|
1 |
$ vim ~/.ipython/profile_nbserver/ipython_notebook_config.py |
記載箇所は
- バインドするIPアドレスを全部
- パスワードを指定
- 証明書を指定
- ブラウザを開かない
となります。
なお、今回は証明書の指定は無しで設定します。
bindアドレスを指定します。
|
1 2 3 |
# The IP address the notebook server will listen on. # c.NotebookApp.ip = '127.0.0.1' c.NotebookApp.ip = '*' |
パスワードの設定
先の手順で取得したハッシュを記載します。
|
1 2 3 4 5 6 7 8 9 |
# Hashed password to use for web authentication. # # To generate, type in a python/IPython shell: # # from IPython.lib import passwd; passwd() # # The string should be of the form type:salt:hashed-password. # c.NotebookApp.password = u'' c.NotebookApp.password = u'sha1:046e2277e775:7fbd40dd1514280715e17c48b2e3a86258cde63c' |
ブラウザを開かない用にします。
|
1 2 |
# c.NotebookApp.open_browser = True c.NotebookApp.open_browser = False |
起動
記載したプロファイルを利用して起動します。
|
1 |
ipython notebook --profile=nbserver |
ブラウザから
http://IPアドレス:8888/
のような形でアクセスして、ログイン後に画面がでれば成功です。
※AWSの場合にはセキュリティグループに妥当なアドレスを許可しましょう。
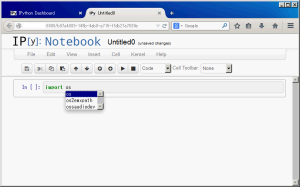
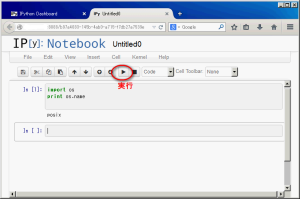
書いたコードは実行ボタンで確認することができます。
サーバ内のアクセスログをパースして表示してみる
https://code.google.com/p/apachelog/
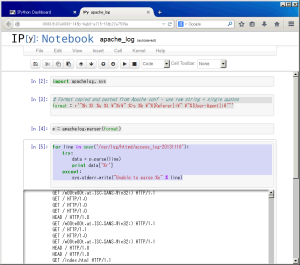
にて配布しているapachelogモジュールを用いてサーバ内のApacheWebサーバのログをパースしてみます。
このモジュールの便利なところはhttpd.confで記載しているログ記述子をそのままフォーマットとして指定できるところです。そのためaccess_logのフォーマットが異なるサーバへの対応も容易に実施できます。
|
1 2 3 4 5 6 7 8 9 10 |
import apachelog, sys # Format copied and pasted from Apache conf - use raw string + single quotes format = r'"%h %l %u %t \"%r\" %>s %b \"%{Referer}i\" \"%{User-Agent}i\""' p = apachelog.parser(format) for line in open('/var/log/httpd/access_log-20131118'): try: data = p.parse(line) print data['%r'] except: sys.stderr.write("Unable to parse %s" % line) |
ほぼipythonでhelpで表示される内容そのままですがコードを編集しながら、すぐに結果が得られる感覚は楽しいと思います。いかがでしょうか。
参考:helpの使い方
|
1 2 3 |
In [2]: import apachelog In [3]: help(apachelog) |
リモートサーバのシステムの情報を取りながら集計を行うなど可能性はありそうですね。
リンク
1次配布先です。
ipython.org
少し古い本ですが、利用例について書かれているオライリーの書籍です。
Python for Unix and Linux System Administration
下記は商用版のサービスを展開しているサイトです。
Windowsでの利用はこちらのanacondaが便利だと思います。
continuum.io
投稿者プロフィール
-
インフラ系のエンジニアです。
運用系のスクリプトを書いたり、オートメーションな世界に向かって日々精進しています。
最新の投稿
 Apache2016年6月24日ApacheWebServerで圧縮転送の設定
 AWS2016年5月17日SkyHopperのインストーラで作成するChef Serverについてのご注意
 AWS2016年3月29日SkyHopper v1.15.2の評価用AMI公開しました
 AWS2016年3月8日SkyHopperのプロダクトページを作成しました


