Tekton Pipelinesは、Kuernetes上で実行するCI/CD形式のパイプラインツールです。Kubernetes Nativeなオープンソースとして開発されています。 TektonはThe Continuous Delivery Foundation(CDF)のプロジェクトとして採用されています。
本記事ではTekton PipelinesのWebベースのUIであるTekton Dashboardのインストール方法と概要を紹介します。
対象読者
- Kubernetes-nativeなCI/CDツールを探している人
- Cloud Delivery Foundation(CDF)に興味がある人
- Cloud Nativeの思想に興味がある人
関連記事
- [Tekton Pipelines] Kubernetes-nativeなCI/CDツールのインストールとタスクの実行例を紹介します!
- [Tekton Pipelines] Tekton Pipelineのパイプライン機能を使ってみよう
もくじ
- はじめに
- 検証環境の紹介
- Dashboardをインストールする
- Dashboardへのアクセス方法
- Tektonリソースをインポートする
- Docker Hub認証情報の作成
- Pipelineを実行する
- おわりに
はじめに
Tekton DashboaedはTekton PipelinesのWebベースのUIです。Tekton Pipelinesのタスクの管理や参照、実行などを行うことができます。Tekton Dashboardの実行には、Tekton Pipelines v0.5以上のインストールが必要です。Tekton Pipelinesのインストール方法は、前回の記事を参照してください。
検証環境の紹介
GKE環境で検証を行いました。検証に利用したKubernetesのクライアントおよびサーバのバージョンは以下の通りです。
|
1 2 3 4 |
<span class="hljs-meta">$</span><span class="bash"> kubectl version --short</span> <span style="color: #999999">Client Version: v1.14.1 Server Version: v1.12.8-gke.10 </span> |
Dashboardをインストールする
はじめにTekton DashboardのソースをGit Hubからクローンします。
|
1 |
<span class="hljs-meta">$</span><span class="bash"> git <span class="hljs-built_in">clone</span> https://github.com/tektoncd/dashboard.git</span> |
kubectl applyコマンドでTekton Dashboardのマニフェストファイルを指定します。
|
1 |
<span class="hljs-meta">$</span><span class="bash"> kubectl apply -f dashboard/config/release/gcr-tekton-dashboard.yaml</span> |
Tekton Dashboardは、Tekton Pipelinesと同じtekton-pipelinesというネームスペースにインストールされます。ネームスペースを指定してPodの起動を確認してみます。
|
1 2 3 4 5 6 |
<span class="hljs-meta">$</span><span class="bash"> kubectl get pods --namespace tekton-pipelines</span> <span style="color: #999999">NAME READY STATUS RESTARTS AGE tekton-dashboard-fb5d8df96-s6xpd 1/1 Running 0 117s tekton-pipelines-controller-756bc5764-lz9bf 1/1 Running 0 2m22s tekton-pipelines-webhook-747c74f59f-n4g2v 1/1 Running 0 2m19s </span> |
Dashboardがインストールされ、実行状態となっています。
Dashboardへのアクセス方法
Tekton Dashboardは、ClusterIPを経由してアクセスすることができます。ClusterIPのポート場号は9097です。
|
1 2 3 4 5 6 |
<span class="hljs-meta">$</span><span class="bash"> kubectl get services -n tekton-pipelines</span> <span style="color: #999999">NAME TYPE CLUSTER-IP EXTERNAL-IP PORT(S) AGE tekton-dashboard ClusterIP 10.0.3.151 <none> 9097/TCP 5m28s tekton-pipelines-controller ClusterIP 10.0.13.160 <none> 9090/TCP 6m10s tekton-pipelines-webhook ClusterIP 10.0.4.144 <none> 443/TCP 6m7s </span> |
kubectl proxyを利用したアクセス
ClusterIP経由でアクセスするために、kubectl proxyコマンドを利用します。
|
1 2 3 |
<span class="hljs-meta">$</span><span class="bash"> kubectl proxy</span> <span style="color: #999999">Starting to serve on 127.0.0.1:8001 </span> |
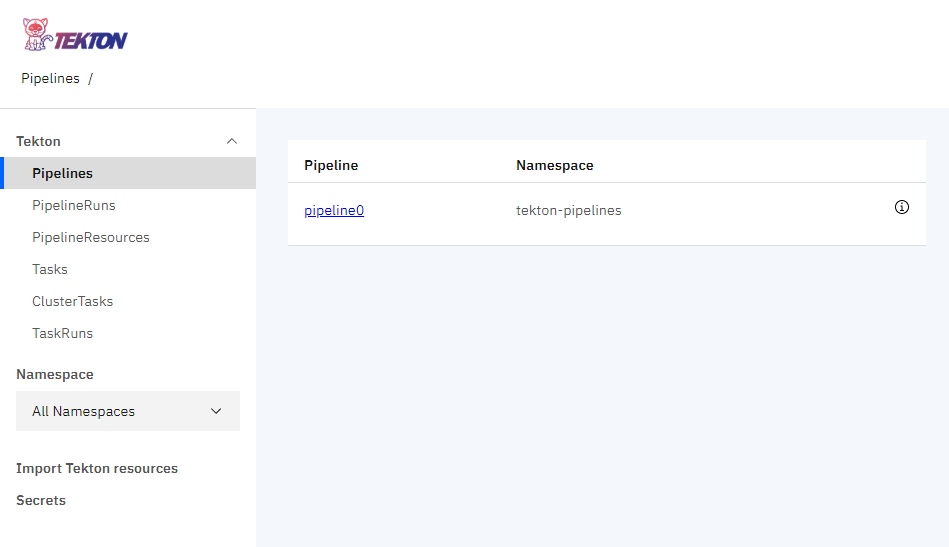
ブラウザでhttp://localhost:8001/api/v1/namespaces/tekton-pipelines/services/tekton-dashboard:http/proxy/にアクセスしてみます。
port-forwardを利用したアクセス
kubectl port-forwardを利用したアクセス方法です。
|
1 2 3 4 |
<span class="hljs-meta">$</span><span class="bash"> kubectl --namespace tekton-pipelines port-forward svc/tekton-dashboard 9097:9097</span> <span style="color: #999999">Forwarding from 127.0.0.1:9097 -> 9097 Forwarding from [::1]:9097 -> 9097 </span> |
ブラウザでhttp://localhost:9097にアクセスします。kubectl proxyとURLの指定が異なるので注意してください。
どちらの方法でもDashboardへのアクセスを終了する場合は、
Ctrl + cでプロキシもしくはポートフォワードの実行を停止してください。
Tektonリソースをインポートする
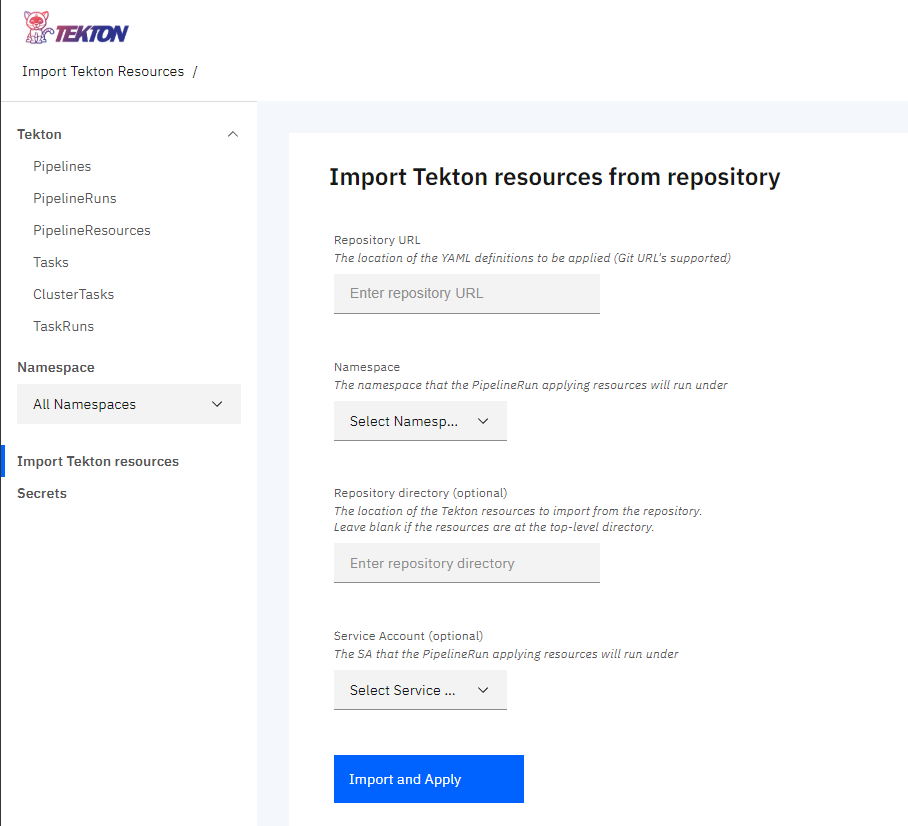
Tekton DashboardからTektonのリソースをインポートして、パイプラインの設定を行ってみます。Tektonリソース(yamlファイル)のGitリポジトリを指定してインポートを行うことができます。はじめにDashboardの左側のメニューからImport Tekton resourcesを選択します。
| 項目 | 入力内容 |
|---|---|
| Repository URL | Tektonリポジトリを格納したGitリポジトリのURL |
| Namespace | Tektonリソースを実行するネームスペース |
| Repository directory (optional) | インポートするリポジトリのディレクトリ。指定しない場合場トップディレクトリが対象。 |
| Service Account(optional) | Tektonリソースを実行するサービスアカウント。デフォルトはtekton-dashboard |
Import and Applyボタンを押すと、Tektonリソースのインポートと適用が実行されます。 ダッシュボードはデフォルトの設定で、サービスアカウントtekton-dashboard、ネームスペースtekton-pipelinesとして実行されています。 ネームスペースtekton-pipelinesのサービスアカウントtekton-dashboardには最低限の権限のみ付与されているため、作成したマニフェストファイルが権限不足で実行できない場合があります。
記事の執筆時点ではServiceAccountの新規作成などが、ダッシュボードのインポートからは行えません。一般的には、クラスタ管理者がServiceAccountの作成を行いますので、ダッシュボードの一般利用の権限としては正しいものと思われます。
今回の実行例では、cluster-adminの権限を付与したサービスアカウントを作成して、そのサービスアカウントを利用します。
ダッシュボードからインポートを行う前に、サービスアカウントと権限付与を行うマニフェストファイルを作成しておきます。
|
1 2 3 4 5 6 7 8 9 10 11 12 13 14 15 16 17 18 19 20 21 |
<span class="hljs-comment"># dashboardAccount.yaml</span> <span class="hljs-attr">apiVersion:</span> <span class="hljs-string">v1</span> <span class="hljs-attr">kind:</span> <span class="hljs-string">ServiceAccount</span> <span class="hljs-attr">metadata:</span> <span class="hljs-attr"> labels:</span> <span class="hljs-attr"> app:</span> <span class="hljs-string">tekton-dashboard</span> <span class="hljs-attr"> name:</span> <span class="hljs-string">tekton-dashboard</span> <span class="hljs-attr"> namespace:</span> <span class="hljs-string">default</span> <span class="hljs-meta">---</span> <span class="hljs-attr">apiVersion:</span> <span class="hljs-string">rbac.authorization.k8s.io/v1</span> <span class="hljs-attr">kind:</span> <span class="hljs-string">ClusterRoleBinding</span> <span class="hljs-attr">metadata:</span> <span class="hljs-attr"> name:</span> <span class="hljs-string">dashboard-cluster-admin</span> <span class="hljs-attr">roleRef:</span> <span class="hljs-attr"> apiGroup:</span> <span class="hljs-string">rbac.authorization.k8s.io</span> <span class="hljs-attr"> kind:</span> <span class="hljs-string">ClusterRole</span> <span class="hljs-attr"> name:</span> <span class="hljs-string">cluster-admin</span> <span class="hljs-attr">subjects:</span> <span class="hljs-attr">- kind:</span> <span class="hljs-string">ServiceAccount</span> <span class="hljs-attr"> name:</span> <span class="hljs-string">tekton-dashboard</span> <span class="hljs-attr"> namespace:</span> <span class="hljs-string">default</span> |
作成したマニフェストファイルをKubernetes上に適用しておきます。
|
1 2 3 |
<span class="hljs-meta">$</span><span class="bash"> kubectl apply -f dashboardAccount.yaml</span> <span style="color: #999999">serviceaccount/tekton-dashboard created </span> |
今回は前回の記事で作成したパイプラインの実行例で利用したTektonリソースをインポートしてみます。Repository URL、Namespaceに以下の値を指定しました。
| 項目 | 入力内容 |
|---|---|
| Repository URL | https://github.com/sumomo-99/TektonSample.git |
| Namespace | default |
| Repository directory (optional) | tekton |
| Service Account(optional) | tekton-dashboard |
Import and Applyボタンを押すと、ボタンの下にリンクが表示されます。
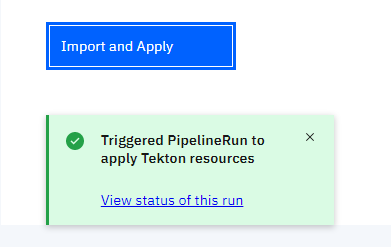
リンクをクリックすることで、インポート(apply)の状態を確認することができます。
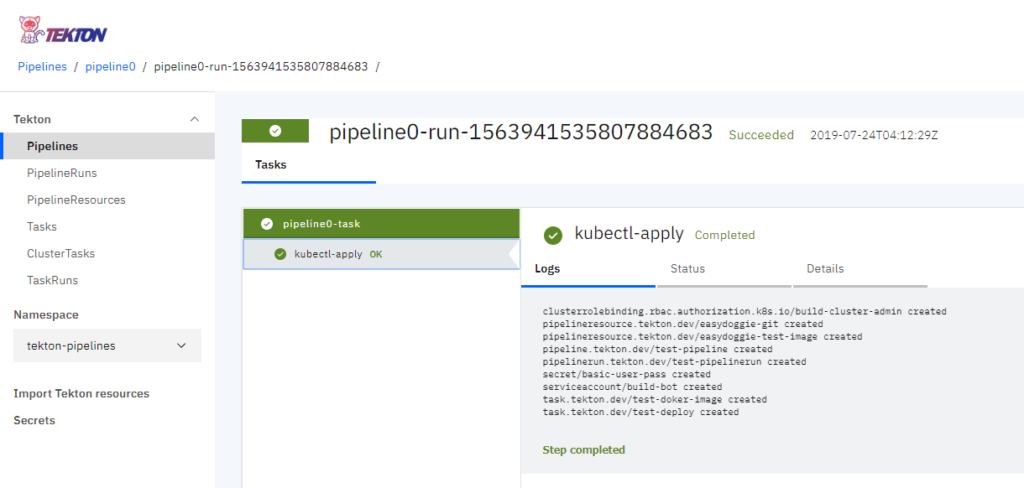
Docker Hub認証情報の作成
Docker Hubへイメージをプッシュするために、Docker Hubの認証情報をKubernetesのSecretに定義します。
|
1 2 3 4 5 6 7 8 9 10 11 |
<span class="hljs-comment"># secret.yaml</span> <span class="hljs-attr">apiVersion:</span> <span class="hljs-string">v1</span> <span class="hljs-attr">kind:</span> <span class="hljs-string">Secret</span> <span class="hljs-attr">metadata:</span> <span class="hljs-attr"> name:</span> <span class="hljs-string">basic-user-pass</span> <span class="hljs-attr"> annotations:</span> <span class="hljs-string">tekton.dev/docker-0:</span> <span class="hljs-attr">https://index.docker.io/v1/</span> <span class="hljs-attr">type:</span> <span class="hljs-string">kubernetes.io/basic-auth</span> <span class="hljs-attr">stringData:</span> <span class="hljs-attr"> username:</span> <span class="hljs-string"><username></span> <span class="hljs-attr"> password:</span> <span class="hljs-string"><password></span> |
作成したSecretをKubernetesに適用します。
|
1 2 |
$ kubectl apply -f secret.yaml secret/basic-user-pass created |
Pipelineを実行する
Tektonリソースのインポートが完了したので、Pipelineを実行してみます。
Import Tekton resourcesでPipelineRunをインポートして実行します。
| 項目 | 入力内容 |
|---|---|
| Repository URL | https://github.com/sumomo-99/TektonSample.git |
| Namespace | default |
| Repository directory (optional) | tekton_run |
| Service Account(optional) | tekton-dashboard |
Import and Applyボタンを押して、PipelineRunを実行してみましょう。しばらく待つと、ダッシュボード上のパイプラインのステータスが以下のように変化していきます。
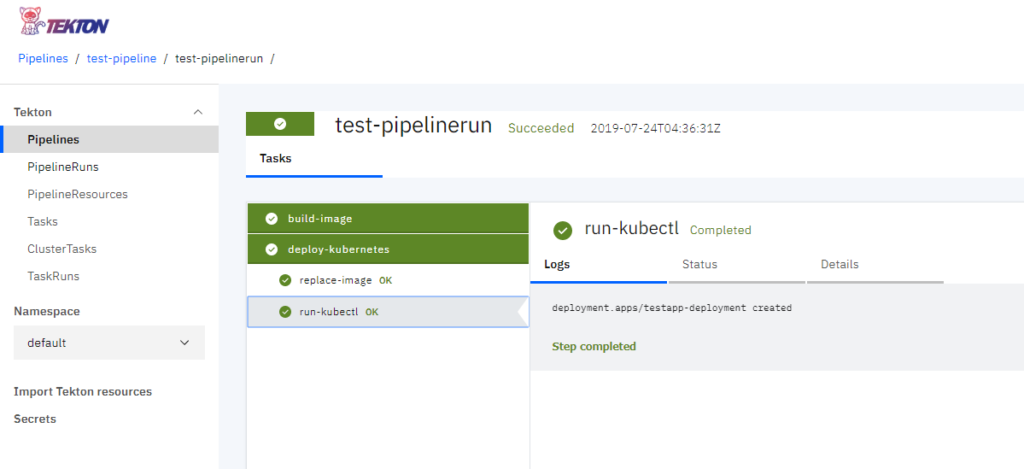
すべてのタスクが緑色で表示されれば、パイプラインの実行は成功です。実行に失敗したタスクは赤字で表示されます。
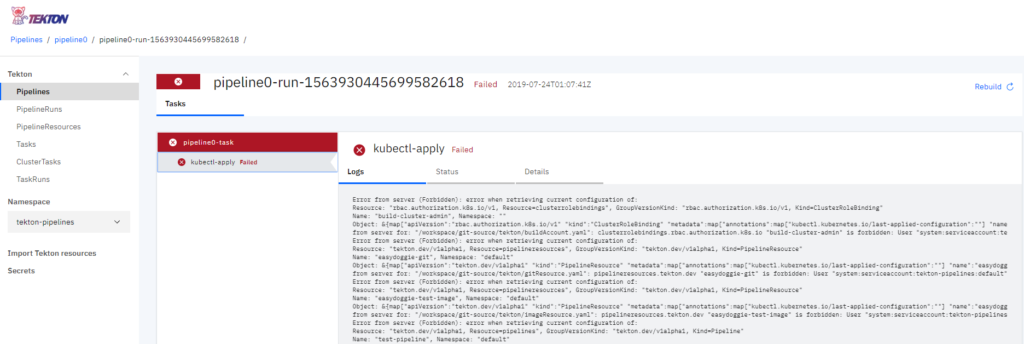
さいごにkubectlコマンドでもPodが起動したのか確認をしておきましょう。
|
1 2 3 4 5 6 |
<span class="hljs-meta">$</span><span class="bash"> kubectl get pods</span> <span style="color: #999999">NAME READY STATUS RESTARTS AGE test-pipelinerun-build-image-q7mzd-pod-d4d77f 0/3 Completed 0 6m7s test-pipelinerun-deploy-kubernetes-5p96g-pod-477bc3 0/3 Completed 0 5m27s testapp-deployment-cdcf6bdb8-wxpxv 1/1 Running 0 5m11s </span> |
正常にPod(testapp-deployment-cdcf6bdb8-wxpxv)が起動しているようです。
おわりに
本記事ではTekton PipelinesのWebベースのUIであるTekton Dashboardのインストール方法と概要を紹介しました。kubectlのコマンドラインベースでは、タスクやパイプラインの実行ログやステータスの確認に非常に手間がかかります。Tekton DashboardはGUIベースで簡単に実行ログやステータスを確認することでできます。便利なツールは積極的に利用してみて、便利さをどんどん周りに伝えていきましょう。

投稿者プロフィール
最新の投稿
 AWS2021年12月2日AWS Graviton3 プロセッサを搭載した EC2 C7g インスタンスが発表されました。
 セキュリティ2021年7月14日ゼロデイ攻撃とは
 セキュリティ2021年7月14日マルウェアとは
 WAF2021年7月13日クロスサイトスクリプティングとは?


