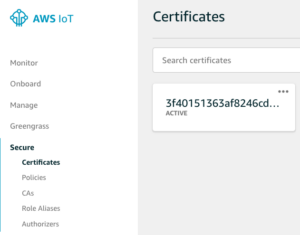
Just-in-Time Registration (JITR) can be used to activate device certificates and attach policies to the certificates immediately after the device is auto-registered. This allows device certificates generated by a certificate authority (CA) other than AWS to automatically register the device certificate once registered allowing customer devices to autoregister and attain the required permissions and policies on first use of the IoT device with the device certificate.
Due to JITR, When you connect to AWS IoT with the device certificate for the first time. It will detect the unknown certificate signed by a registered CA and will auto-register the certificate.
Below is the Flow as to how JITR Works
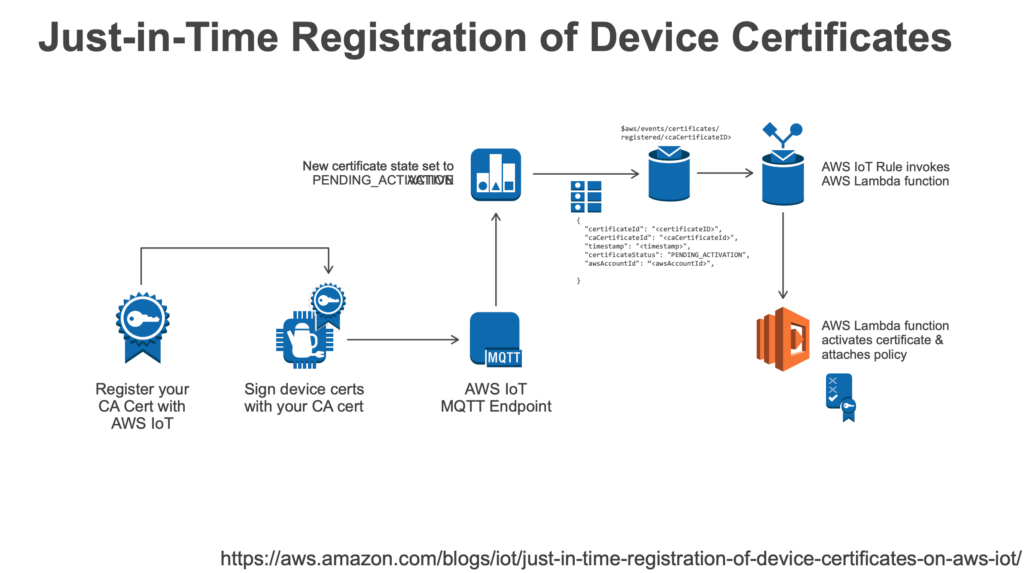
- Connect to IoT
- Register CA Certificate with AWS IoT (Certificate Status at this stage: PENDING_ACTIVATE)
- Enable auto-registration of certificates.
- Sign the device certificate with the registered CA Certificate
- Send MQTT Event
- Set up a Rule on MQTT to trigger a lambda function to attach policies, create and attach thing & activate the certificate
- Connect to AWS IoT using the device certificate.
In order to enable JITR & enable auto-registration with a sample certificate,
1.Register your CA Certificate
|
1 2 |
openssl genrsa -out sampleCACertificate.key 2048 openssl req -x509 -new -nodes -key sampleCACertificate.key -sha256 -days 365 -out sampleCACertificate.pem |
2. Get AWS IoT Registration code
|
1 |
aws iot get-registration-code |
3. Create a private verification CSR
|
1 2 |
openssl genrsa -out privateKeyVerification.key 2048 openssl req -new -key privateKeyVerification.key -out privateKeyVerification.csr |
Enter the registration code acquired from the previous step in the Common Name field
|
1 |
Common Name (e.g. server FQDN or YOUR name) []: REGISTRATIONCODEFROMSTEP2 |
For Mac users in case of errors replace the system OpenSSL by upgrading OpenSSL using the below commands
|
1 2 3 |
brew install openssl brew upgrade openssl@1.1 brew link --force openssl |
4. Use the sample certificate and the verification CSR to create a new certificate that includes the registration code
|
1 |
openssl x509 -req -in privateKeyVerification.csr -CA sampleCACertificate.pem -CAkey sampleCACertificate.key -CAcreateserial -out privateKeyVerification.crt -days 365 -sha256 |
5. Use the sample CA certificate with the verification certificate to register the CA Certificate to AWS IoT using AWS CLI
|
1 |
aws iot register-ca-certificate --ca-certificate file://sampleCACertificate.pem --verification-certificate file://privateKeyVerification.crt |
New certificates are registered with 'INACTIVE' state which can be verified using
|
1 |
aws iot describe-ca-certificate --certificate-id <certificateId> |
6. To update the status to Active
|
1 |
aws iot update-ca-certificate --certificate-id <certificateId> --new-status ACTIVE |
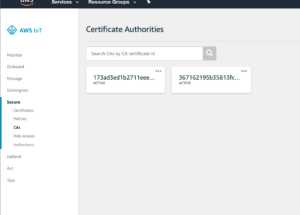
On updating the CA certificate status the CA can be viewed in the AWS IoT console
7. By default, Auto Registration is disabled to enable it & to allow JITR
|
1 |
aws iot update-ca-certificate --certificate-id <caCertificateId> --new-auto-registration-status ENABLE |
On enabling auto-registration, it can be toggled in the AWS console or the above command can be used to disable the status
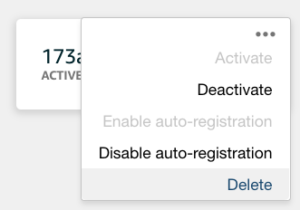
Using the above created CA certificate we can sign a device certificate to allow auto-registration for IoT devices using MQTT Events Rule with a lambda function to assign the required policies to the device certificate.
When AWS IoT auto-registers a certificate or when a certificate in PENDING_ACTIVATION status connects, it publishes a message to the following MQTT topic:
|
1 |
$aws/events/certificates/registered/<caCertificateID> |
8. Create a Lambda Function
- Set the Runtime as NodeJs with the following code
- Edit the code with the region you will be running the example
- Update the Lambda Function's Role Policy Document to
-
1234567891011121314151617181920212223{"Version":"2012-10-17","Statement":[{"Effect":"Allow","Action":["logs:CreateLogGroup","logs:CreateLogStream","logs:PutLogEvents"],"Resource":"arn:aws:logs:*:*:*"},{"Effect":"Allow","Action":["iot:UpdateCertificate","iot:CreatePolicy","iot:AttachPrincipalPolicy"],"Resource":"*"}]}
- select Allow & Create Function
9. Create a Lambda Rule
- In AWS IoT Console, Select Create a resource.
- Select Create a rule.
- Type a name and description for the rule.
- Enter the following settings for the rule:
SQL version: 2016-03-23
Attribute: *
Topic filter: $aws/events/certificates/registered/<caCertificateID> Note: Replace <caCertificateId> with the ID of the registered CA certificate. - For Choose an action, select Insert this message into a code function and execute it (AWS Lambda).
- From Function name, choose your AWS Lambda function name, and then choose Add action.
- Select Create to create your AWS Lambda function.
10. Create a sample Device certificate linked with the sampleCACertificate created earlier
|
1 2 3 |
openssl genrsa -out deviceCert.key 2048 openssl req -new -key deviceCert.key -out deviceCert.csr openssl x509 -req -in deviceCert.csr -CA sampleCACertificate.pem -CAkey sampleCACertificate.key -CAcreateserial -out deviceCert.crt -days 365 -sha256 |
Create a certificate file that contains the device certificate and its registered CA certificate.
|
1 |
$ cat deviceCert.crt sampleCACertificate.pem > deviceCertAndCACert.crt |
11.Install mosquito client to send MQTT messages using the above device certificate to connect to AWS IoT
Get AWS IoT Endpoint
|
1 |
aws iot describe<span class="token operator">-</span>endpoint |
Replace <endpoint> from the below command with the endpoint displayed
|
1 |
mosquitto_pub --cafile root.cert --cert deviceCertAndCACert.crt --key deviceCert.key -h <endpoint> -p 8883 -q 1 -t foo/bar -i anyclientID --tls-version tlsv1.2 -m "Hello" -d |
You will see a TLS failure when you run the command because AWS IoT disconnects the connection after the registration of the device certificate. Now view the certificate in the AWS IoT Console
In order to Deactivate the certificate
|
1 |
aws iot update-ca-certificate --certificate-id <certificateId> --new-status INACTIVE |
To Revoke the CA Certificate permanently
|
1 |
aws iot update-certificate --certificate-id <certificateId> --new-status REVOKED |
References:
https://aws.amazon.com/blogs/iot/just-in-time-registration-of-device-certificates-on-aws-iot/
https://aws.amazon.com/blogs/iot/setting-up-just-in-time-provisioning-with-aws-iot-core/
https://www.slideshare.net/AmazonWebServices/the-lifecycle-of-an-aws-iot-thing
投稿者プロフィール

-
Zabbixとお酒をこよなく愛す元バンドマン。
たぶん前世は風船。
最新の投稿
 AWS2021年3月3日AWS大阪リージョンが利用可能になりました!
 AWS2021年2月9日Using EFS in AWS ECS Fargate
 AWS2020年4月24日Just-in-Time Registration with AWS IoT core
 AWS2020年4月14日[AWS Fargate] Platform Version 1.4.0. Updates


